

Nail this $15 per table centerpiece challenge by leveraging seasonal blooms (hint: they’re fresher and cheaper), and scooping stylish finds from the Dollar Store. Opt for minimalism—small bud vases or LED candles add impact without dominating. Use DIY tricks: wrap vases with ribbon, throw faux eucalyptus into the mix. Keep it under 12 inches to guarantee sightlines. Your mission is clear and measured. Want to know how to budget like a boss?
What you’ll accomplish (and what ‘done’ looks like)
When you pivot from dreaming to doing, you’ll execute centerpieces that ooze curated cool without bleeding your budget. With just $15 per table, you can nail budget centerpiece ideas that scream sophistication and practicality. Forget about spending hundreds on floral arrangements; inexpensive centerpieces can still make a statement. By strategically sourcing materials from budget retailers, you create budget table decor that’s adaptable and visually striking. Seasonal blooms are more affordable and fresher than out-of-season varieties, so choosing them can maximize quality while minimizing costs. Sticking to a realistic budget upfront can prevent financial derailment and keep you on track. Here’s the hustle: plunge into Dollar Tree for floral bases, glass vases, and flickering candles. Layer these elements—think heights, textures, and colors. The result? A polished look that’s all savvy, zero extravagance. Remember, it’s about smart choices and efficiency. Now, grab your list, hit the store, and start crafting. Your wedding vision just got real.
Quick start (the short version)
Ready to execute killer centerpieces without blowing your budget or your sanity? Let’s strategically streamline the process of creating cheap centerpieces that get the job done with kinetic precision. Here’s the quick start guide:
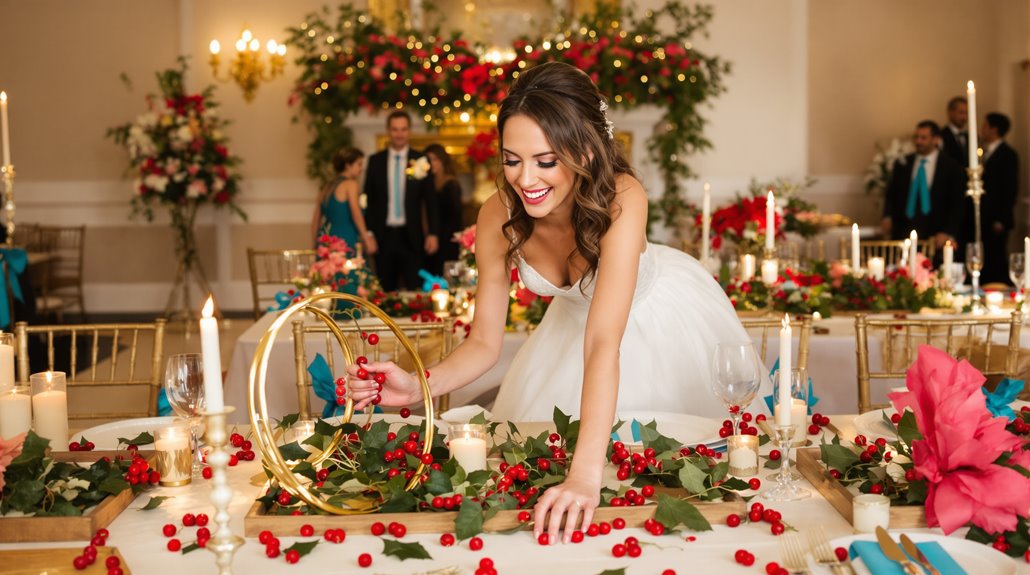
- DollarTreeGoldenCenterpiece: Use a cylinder vase with a flameless candle, gold holly-berry stems, and poinsettias for a high-impact look under $15.
- Baby’sBreathCandleCenterpiece: A 9-inch glass vase filled with baby’s breath and a white taper candle; elegance and simplicity for $15.67.
- StackedCylinderCenterpiece: Glue gold Dollar Tree boxes for an elongated design; costs under $5.
- WoodHoopCandleHolder: Assemble a wooden hoop and spray with gold shimmer for a spring vibe under $5.
- DecoratedGlassVase: Use wood trays and gold paint to create a sturdy, chic base.
Now, pivot to execution and watch your tables transform!
Before you start: inputs you need
Before diving into centerpiece creation, let’s talk inputs—because a solid game plan is non-negotiable. You’ve got $15 per table and zero time for fluff. Prioritize these essentials:
- Budget Strategy: Calculate total table count and allocate funds. Work in a 10-15% buffer for surprises and a 5-10% contingency fund.
- Table Count Verification: Confirm with your venue—account for main and breakout rooms.
- Event Goals: Clearly define your style and scale. Align with budget constraints and stakeholder priorities.
- Sourcing Options: Check venue decor first. Negotiate with local vendors, scout dollar stores, consider free elements, and evaluate rentals. Organizing event logistics is crucial because it helps avoid surprise fees and last-minute stress.
- Cost Categories: Separate floral from props. Account for taxes, fees, and transport. Factor in vendor choices which can impact your budget based on their service offerings and flexibility.
Reality Check: Stick to the plan, but pivot if needed.
Step-by-step process
Let’s get real—crafting killer centerpieces on a budget starts with knowing your constraints. First, map out your date range, budget ceiling, and any non-negotiables that will shape your decisions. Once that’s clear, prioritize your decisions to streamline the process, then create a timeline that hits every milestone with precision. Remember that venue booking is the backbone of the timeline, and securing it first will help set the overall planning process in motion.
Step 1: Clarify constraints (date range, budget ceiling, non-negotiables)
When tackling wedding centerpiece planning, start by nailing down your constraints with military precision. First, lock in a $15-per-table budget—no time for splurges. Strategically embrace minimalistic designs to stretch those dollars, opting for faux flowers or seasonal greenery like eucalyptus to keep costs in check. Next, mark your date range. Out-of-season blooms will obliterate your budget, so pivot to what’s available and affordable. The exact table count is your next target. This streamlines material buys, guaranteeing you’re not overproducing. Non-negotiables? Match centerpieces to your wedding palette and style—these are your must-haves. Confirm container stability (don’t let wobbly bases ruin your vibe). Utilize resources like Facebook Marketplace to find second-hand wedding decorations from other brides, which can help keep costs down. Consider using a dedicated calendar to schedule your centerpiece planning milestones and avoid last-minute scrambles. Reality Check: Neglecting any constraint risks blowing the budget and missing your vision.
Step 2: Build the decision order (what to decide first so everything else is easier)
Streamlining your decision-making process is your golden ticket to executing a wedding day that’s more “wow” than “whoops.” Start by nailing down the theme and concept—your North Star guiding every choice from centerpieces to color palette. Define your event’s purpose and objectives first; these align all elements and guarantee that you’re not throwing spaghetti against the wall. Analyze audience preferences with quick surveys—data-driven decisions are your friend. Once your theme resonates with your savvy guests, set SMART goals for a measurable impact. Next, pivot to format: formal, interactive, or somewhere in between. Confirm venue logistics and compatibility. Consider how selecting a consistent production team can streamline communication and enhance the overall quality of your event. Ensuring guest comfort through streamlined logistics and engaging entertainment can elevate the overall guest experience. This sequence strategically aligns with your $15-per-table budget, making certain each decision accelerates the next. Now, grab that checklist and start ticking.
Step 3: Create the timeline (milestones + deadlines)
Kicking off your wedding plans with a bang is all about momentum. Start with the event date as your anchor. Use the work-backwards method: pinpoint major milestones like venue confirmation and vendor coordination. Strategically schedule tasks backward to guarantee everything aligns. Include buffer time for those inevitable hiccups—because life. Define key milestones for a streamlined view: think contract signings and invitation sends. Assign non-negotiable deadlines to every task, breaking them into phases—6+ months, 3-6 months, final month, and week. Create regular checkpoints for pivoting and keep progress reviews efficient. Use real-time tracking for team and vendor assignments. Consider event insurance for additional protection in the case of unforeseen cancellations or mishaps. Customize a timeline template with swimlanes for clarity, and download it in usable formats like Excel. An Event Planning Timeline is a detailed schedule that outlines tasks, milestones, and deadlines from concept to post-event follow-up, serving as a roadmap for event planners. Ready, set, execute.
Step 4: Execute vendor outreach (scripts + tracking)
Executing vendor outreach is where your wedding planning enters beast mode. You’ve got a $15-per-table budget, and now it’s time to strategically connect with vendors who get the job done. Start with a smart script: “Mind if I take 30 seconds for why I called?” Immerse yourself in your event details and highlight common pain points. Whether via phone or email, your approach should be concise and value-driven. Use LinkedIn and local directories to compile a list of 10-20 vendors per category. Track responses in a spreadsheet—name, contact, date, outcome—and follow up persistently. Utilizing CallHub’s software can enhance communication quality and help automate outreach tasks. Email analytics and personalized landing pages keep engagement high. Ensure all vendor agreements and communications are documented in writing to avoid future disputes. Your goal? Secure those bulk discounts and low minimum orders. Ready to hustle? The next step awaits.
Step 5: Lock the plan (contracts, deposits, and contingency buffers)
Locking in your wedding plan is where your project management skills take center stage. Immerse yourself in contracts with surgical precision. Confirm your site inspection clause allows re-inspection for any venue changes, ensuring venue condition remains optimal. Use tiered deposits tied to clear deliverables to sidestep hefty early commitments. Flex payment terms to streamline processing and review. Attrition clauses? Your secret weapon against unexpected costs. Remember to account for service charges and gratuities, as they can significantly impact your overall budget.
Next, establish non-negotiable cancellation clauses—no last-minute surprises here. Force majeure is your friend; it covers unforeseen events like natural disasters. Protect your budget with a 10-15% contingency buffer for those “didn’t-see-that-coming” moments.
Reality Check: Don’t skimp on these steps. Neglecting contract details can derail your vision faster than a misplaced centerpiece. Now, move forward with confidence and hustle.
Step 6: Run weekly check-ins (how to stay on track without spiraling)
How do you keep your wedding plans from veering off course amidst the chaos? By running weekly check-ins that keep you streamlined and sane. Start every meeting with quick announcements and task reviews—think of it as your roadmap. Track progress against weekly targets and spotlight any challenges. If bottlenecks like software glitches pop up, troubleshoot fast, and pivot quickly. Celebrate victories, big or small, to keep your team’s morale high. Public shout-outs work wonders. Strategically plan adjustments based on feedback and prep trial runs to guarantee everything moves like clockwork. Always verify your data for accuracy. Weekly check-ins are essential for feedback exchange and employee engagement, providing a space for two-way communication that helps maintain focus and accountability. With vendor coordination being a significant aspect of wedding planning, these meetings can help ensure smooth collaboration and reduce stress. This system isn’t just nice-to-have; it’s non-negotiable. Your actionable takeaway? Use these check-ins to maintain control and accelerate momentum.
Template you can copy/paste (checklist + tracker)
Ready to execute a high-impact centerpiece without a hitch? Let’s get strategic with a checklist and tracker that’ll accelerate your project management game. First, source your supplies: grab gold metallic holly-berry stems and poinsettias from Dollar Tree. Snag a styrofoam disc, glass vase, and wooden trays for under $1.25 each. Your total cost? About $15.75, taxes excluded.
Next, assemble like a pro. Secure a flameless candle with glue dots, stack trays for height, and spray those hoops metallic gold. Track your progress with a simple spreadsheet—list supplies, costs, and assembly steps. Pivot as needed but stick to your timeline. This template doesn’t just keep you organized; it’s your secret weapon against chaos. If you’re planning wedding catering ideas or any reception menu, applying a similar strategic approach can enhance your event’s overall success. Now, go create magic with efficiency and flair!
Common mistakes (and how to avoid them)
Avoiding common pitfalls in centerpiece creation can save you a ton of stress and keep your wedding planning on track. Overestimating your skills or underestimating costs can turn your big day into a logistical nightmare. Here’s how to sidestep the chaos:
- Plan a budget buffer: Allocate a 10-20% contingency fund to absorb unexpected expenses.
- Be realistic about your skills: Tackle only feasible DIY projects to prevent burnout.
- Maintain clear sightlines: Avoid tall arrangements that block conversations.
- Embrace seasonality: Opt for local, seasonal flowers to keep costs in check.
- Detail your plan: Create a clear timeline and expense breakdown to avoid last-minute surprises.
Execute these strategies, and you’re on the fast track to centerpiece success. Keep it strategic, and don’t let unnecessary stress sidetrack you.
FAQ
You’re juggling a million things, so let’s get strategic with your time. Executing high-impact centerpieces takes as little as an hour with a streamlined plan—just focus on the non-negotiables like trios of pillar candles or recycled wine bottles. Delegate tasks like vendor follow-ups to someone you trust, track progress weekly, and if a vendor ghosts you, pivot quickly by having backup options ready.
How long should this take if we’re busy?
How much time should you realistically carve out for planning when your schedule’s tighter than a pair of wedding shoes after the buffet? If you’re juggling a career, social life, and wedding logistics, streamline your centerpiece project to fit snugly into a few focused hours. Think of it as a mini-project—identify non-negotiable tasks, create a tight checklist, and execute with precision. Use Gantt charts or color-coded calendars to visualize timelines, keeping the chaos at bay. Factor in essential emails and quick vendor check-ins; those aren’t just busywork—they’re your lifeline to staying on schedule. Use tech efficiently—QR codes for quick coordination, centralized channels for communication. Keep the ball rolling with weekly progress reviews and rapid pivots if necessary. Now, tackle that centerpiece with confidence!
What’s the minimum version that still works?
When it comes to centerpieces, less can absolutely be more—especially when your schedule and budget are tighter than a pair of freshly polished wingtips. You need a centerpiece that’s executed with precision and style without breaking the bank. Let’s talk strategy: for round tables, a sleek arrangement covering 1/3 of the table diameter works like a charm. Narrow tables? Go for bud vase trios—compact yet impactful. Stick to low options under 12 inches or skyscrapers over 24 inches to maintain clear views. Proportion is non-negotiable; use the 60-30-10 color rule for a cohesive look. It’s about filling space, not overwhelming it. Prototype, refine, and execute. Your next move? Test your centerpiece in venue lighting for real-world success.
What can I safely delegate?
Ever wondered which tasks you can delegate without losing control of your wedding day chaos? Let’s streamline this hustle. Start by offloading RSVPs collection and management, vendor communication, and initial contacts. These tasks are prime for delegation because they’re straightforward and time-consuming—perfect for someone else to execute. Registration and check-in processes? Delegate those too. This allows you to focus on strategic decisions, not logistics.
What if a vendor isn’t responding?
You’ve handed off the RSVP chaos, but what if a vendor pulls a vanishing act? First, breathe. Give them 1-2 weeks before you escalate. If they’re still MIA, it’s time to pivot. Try reaching out via email, social media, or even a direct phone call. Be persistent but professional—stress the impact on your planning without sounding like a bridezilla. Document every attempt: who, when, how. If needed, escalate to a manager or your wedding planner. Still ghosted? Start researching backup vendors who can step in swiftly. Share your saga for some sympathy and flexibility with new vendors. Remember, the clock’s ticking; prioritize those who respond within a week. Your wedding isn’t the place for radio silence.
What should I track weekly?
So, how do you keep this wedding train on track each week? Here’s the lowdown: Budget tracking isn’t just a good idea—it’s non-negotiable. Update your budget templates by comparing actual spending to what you’ve allocated. This includes catering, equipment, and vendor costs. RSVP and attendance? Keep chasing down those non-responders and confirm headcounts with VIPs. Vendors need your attention too—weekly confirmations of placements, assets, and contracts are key. Promotion and registration progress require monitoring of campaign effectiveness and ticket sales. Finally, get your team prepped—review goals, timelines, and conduct dry runs. Can you feel that momentum? It’s your wedding machine in action. Next step? Streamline the chaos; execute weekly check-ins like clockwork. You’ve got this.
Key takeaways
When you’re ready to execute the perfect wedding centerpiece on a budget, remember this: it’s all about strategic choices and efficient execution. Focus on mixing sizes and elements for dynamic visual appeal. You can create stunning centerpieces for under $15 using smart selections and a bit of creativity.
- Utilize Dollar Store Finds: Choose Harlow vases, tealight holders, and decorative sculptures for a luxe touch at a fraction of the cost.
- Leverage DIY Techniques: Wrap vases with ribbon or use log slices for a rustic base.
- Incorporate Seasonal Elements: Use faux eucalyptus and LED candles to add drama and warmth.
- Mix and Match: Balance centerpiece sizes to keep costs low while maintaining impact.
- Think Multipurpose: Repurpose items from home to stretch your budget.
Reality check: Don’t overcomplicate. Less is more.